
Steam Deck SSD Upgrade & Dual Boot
Table of Contents
Intro⌗
Support for Microsoft games on Steam Deck (and by extension, Linux) is surprisingly decent these days. Forza, Halo, Sea of Thieves all work well using the ‘Proton’ compatibility layer built-in to SteamOS, and Xbox titles can be streamed from the Cloud using the native Edge browser.
It’s nice to see Microsoft show some enlightenment with respect to Linux coexistence, but unfortunately one major offering is missing - Game Pass. In order to run these games on Steam Deck, you currently have to own them via Steam, leaving Game Pass subscribers out in the cold.
If you are willing to install Windows on Steam Deck, you can work around this for the meantime. It’s not perfect, but worth trying.
Storage Woes⌗
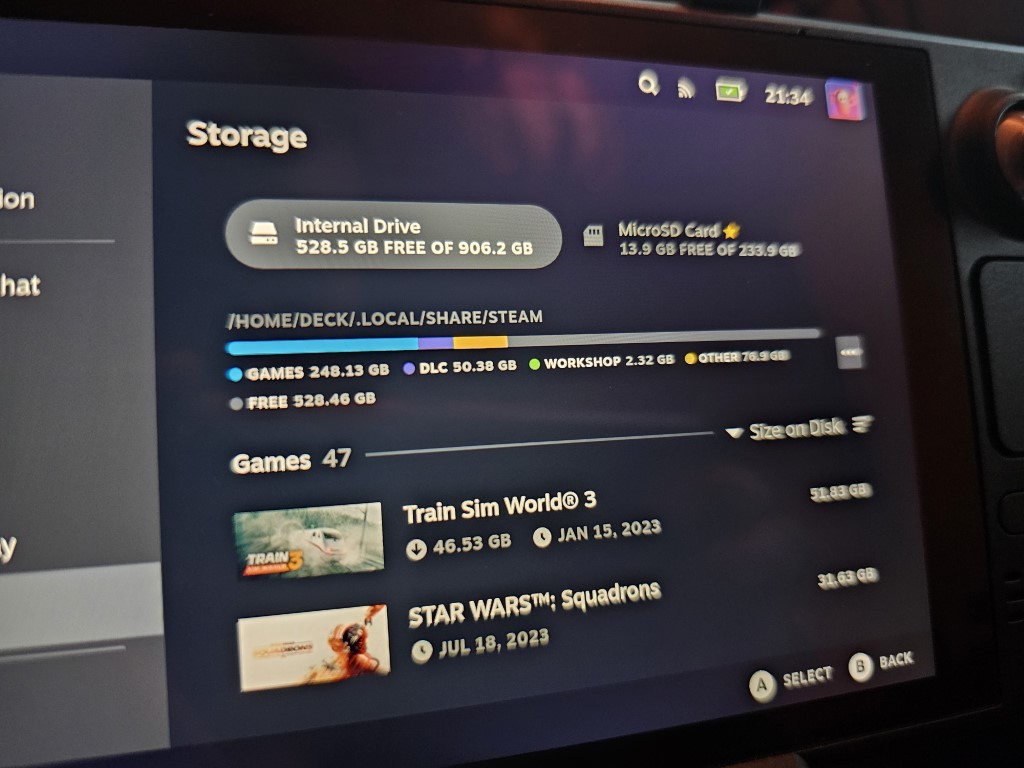
My 512GB Steam Deck was already nearly full before even considering a Windows install. I tried running Windows-to-Go via a fast SD card, but honestly the performance was still woeful.
I grabbed a 1TB Corsair MP600 Mini and decided to perform some surgery on Valve’s handheld.
Tools required⌗
- A new SSD
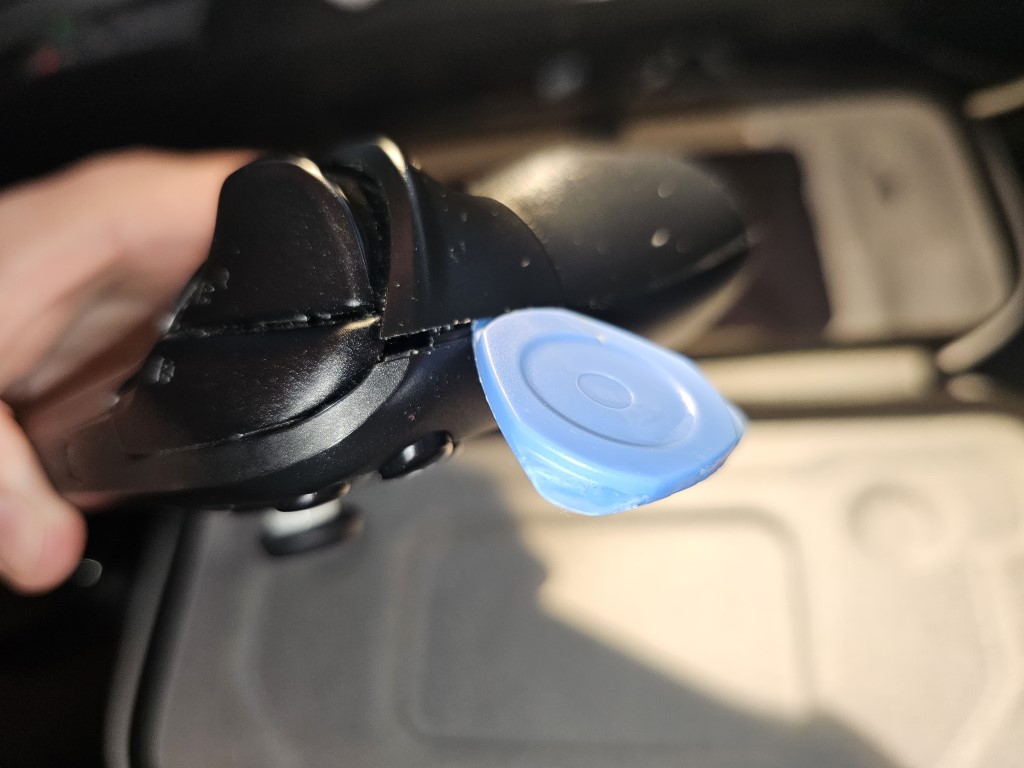
- Soft plastic spudgers or guitar picks
- Small cross-head screwdriver (Approx. PH0/PH1 sized, with narrow bits for recessed screws)
- Tweezers
- Suitable work surface such as the Steam Deck’s own travel case
- USB enclosure for cloning the original SSD
Preparation⌗
It hopefully goes without saying - THIS MAY VOID YOUR WARRANTY AND I TAKE NO RESPONSIBILITY! You’re flying solo here, but hopefully the info below is helpful.
Cloning the OS⌗
If you want to transfer the contents of your existing SSD, you’ll need some sort of external enclosure to connect it to the Deck and clone it. I use the Sabrent EC-SNVE as it’s cheap and fast. You don’t need any special disk cloning software - it can be done from the Deck itself.
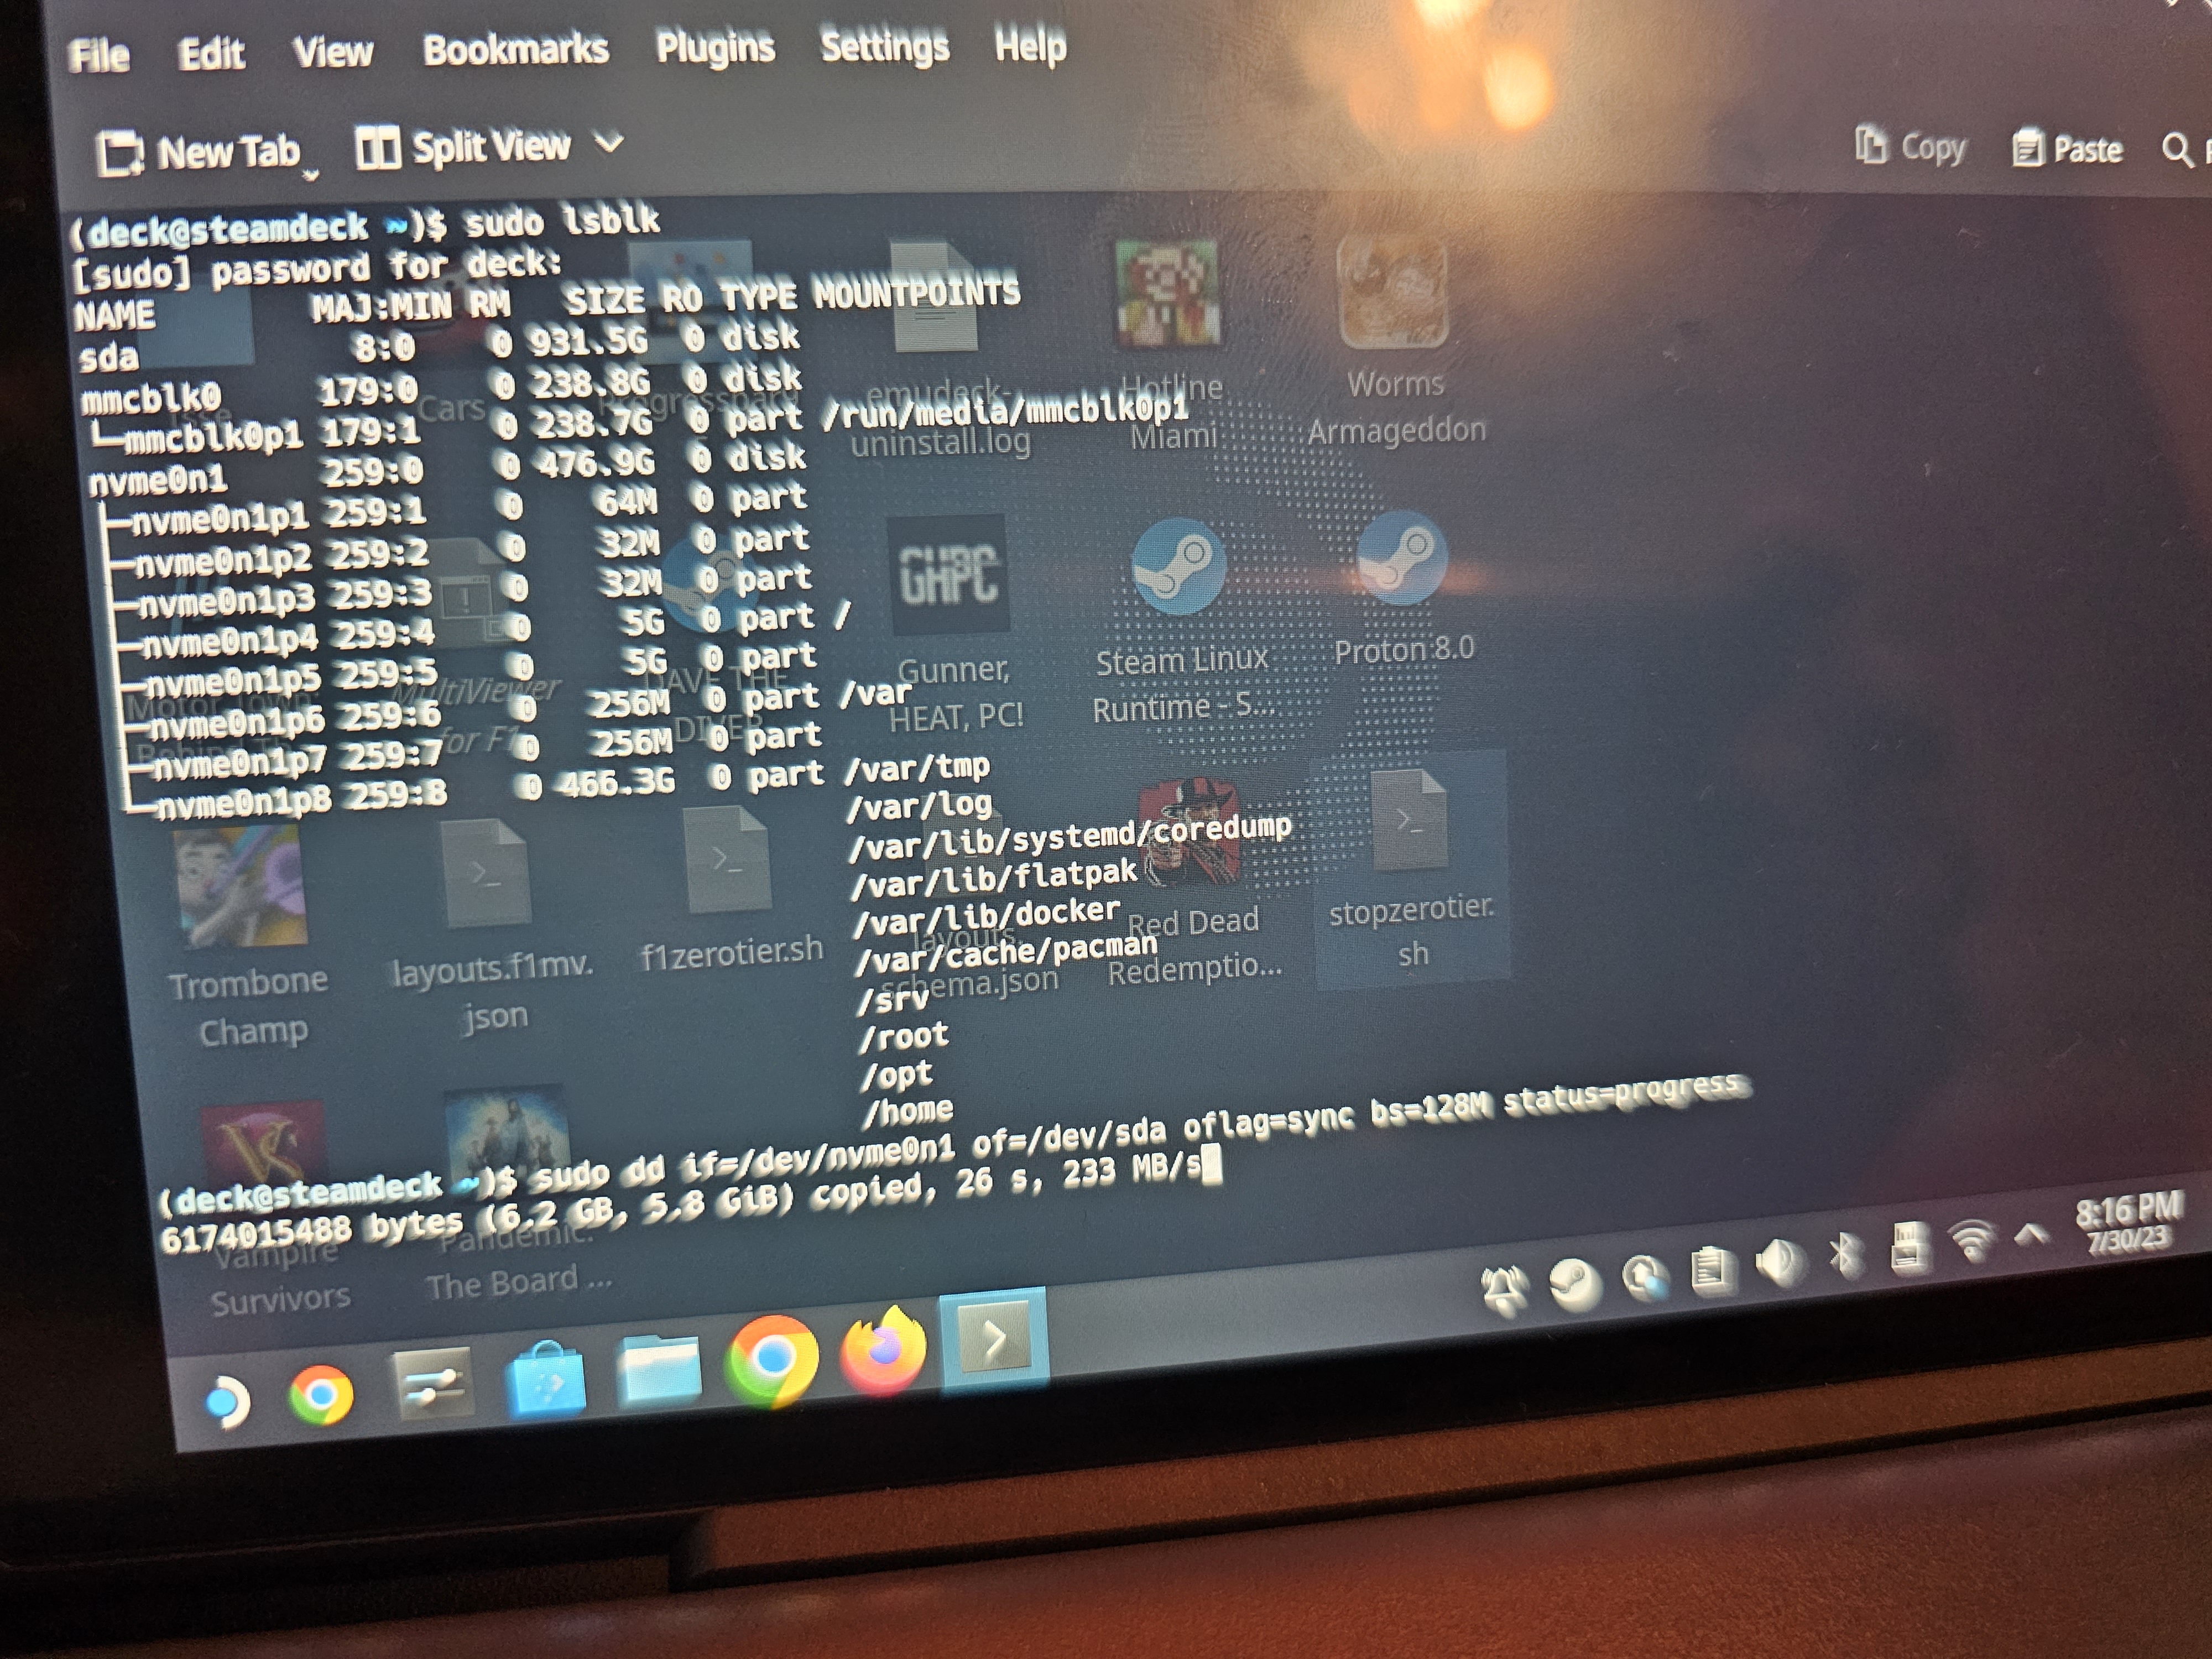
Boot up your Steam Deck and switch to Desktop mode. Open a terminal (Konsole) window and do:
sudo lsblk
… to list all your storage devices by name.
Your source is going to be the internal SSD, which should be listed as nvme0n1 with a tree of partitions below it.
The destination is going to be the external SSD, in my case this was listed as ‘sda’. Check the size column to confirm that you have a note of the correct drives. If you have a MicroSD card inserted, it might be simpler to remove it now and avoid any potential mix-ups.
To start the clone, do the command:
sudo dd if=/dev/nvme0n1 of=/dev/sda oflag=sync bs=128M status=progress
- if is the input file - everything in Linux is represented as a file, even devices. Our internal SSD is at ’/dev/nvme0n1’.
- of is the output file - in this case our external SSD at ’/dev/sda’.
- The oflag=sync flag makes sure that every block is physically written to the external SSD before the next one, instead of sitting in system write cache. This can help prevent corruption. Note ‘oflag=sync’ is NOT the same as ‘conv=sync’!
- bs=128M should help speed things up by transferring bigger chunks. Some SSDs can handle larger or smaller values.
- status=progress prints the transfer speed and progress in the terminal.
In my case, the transfer took around 30 minutes. Make a cup of tea and get your tools ready for the next stages…
When the transfer is done, shut the machine down from the power menu and disconnect the external SSD enclosure. Reboot into the BIOS by holding Volume Up + Power. Use the D-Pad to navigate to Setup » Power » Battery Storage, and enable it.
Battery Storage mode means your Steam Deck will ignore the power button so it shouldn’t accidentally turn on during this work. It will only turn on again when you connect the USB-C power supply.
Installing the SSD⌗
First - REMOVE YOUR MICROSD CARD! It will get snapped if you don’t.
Second - lay the Steam Deck screen down somewhere safe, with the screen properly protected. I used the travel case as it has handy cut-outs for the joysticks.
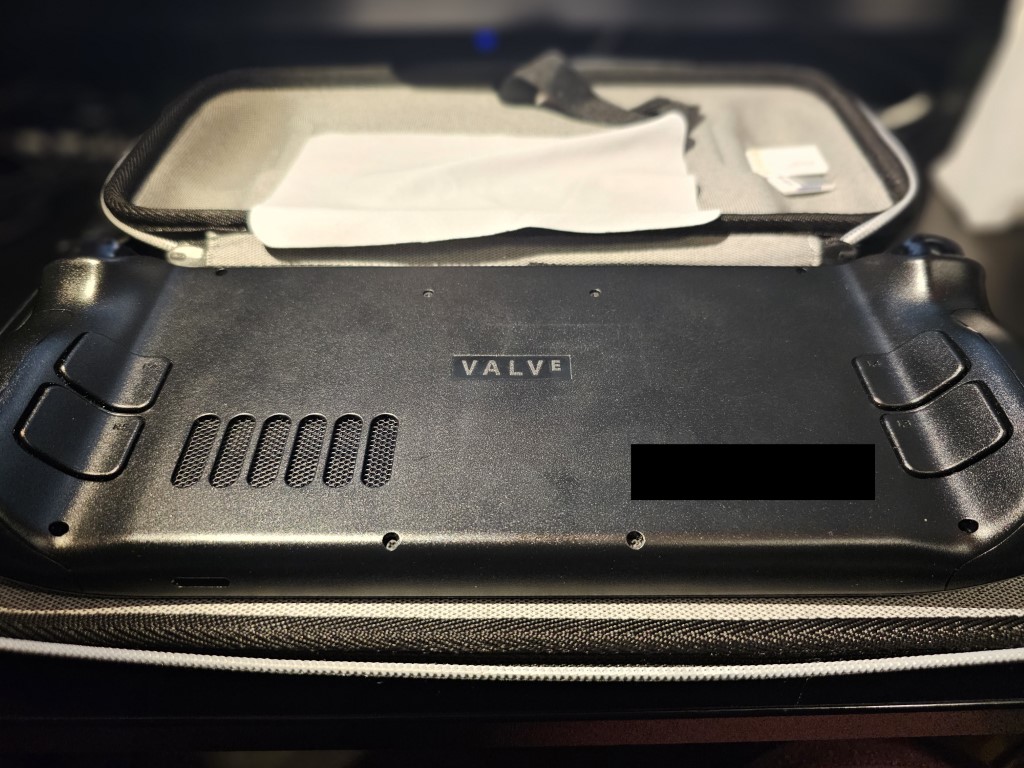
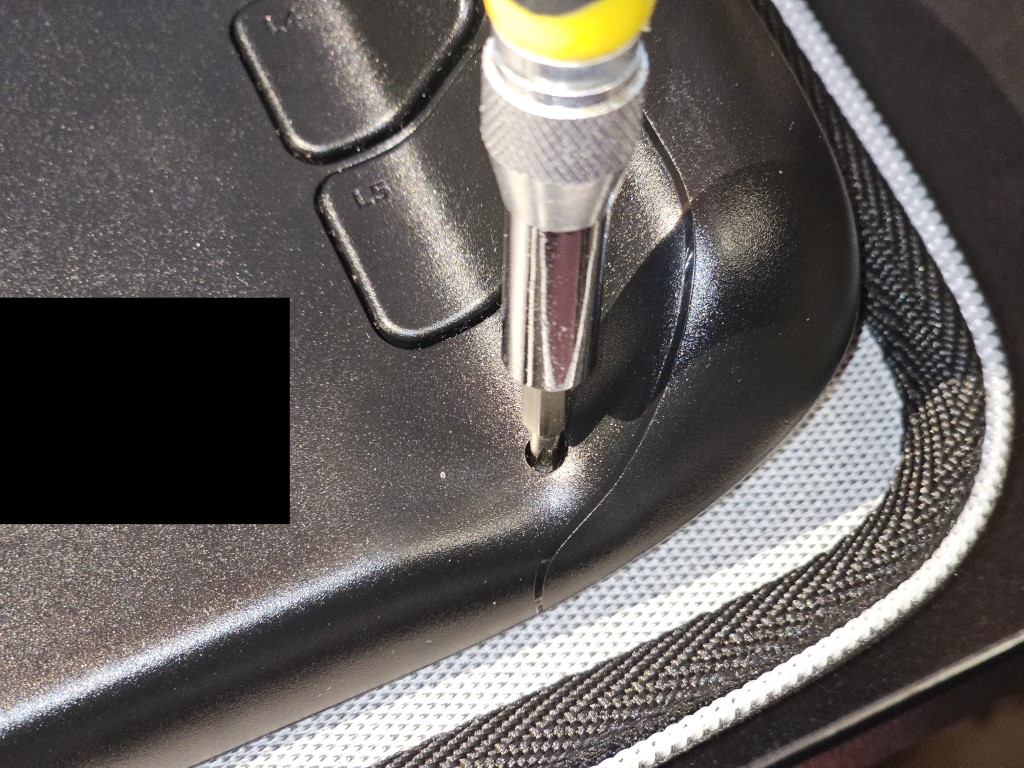
Next, remove the 8 screws securing the rear cover. The 4 inner screws are a different length to the 4 ‘outer’ screws, and you’ll need a narrow bit for the recesses.
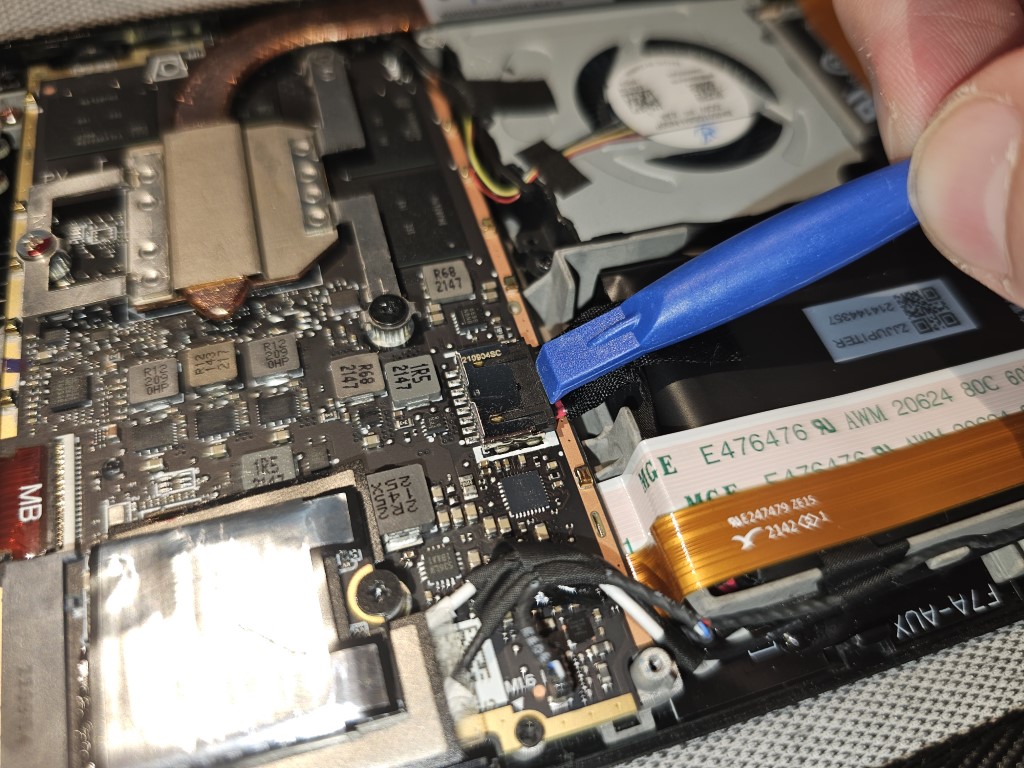
With the screws out, gently pry the case open, starting from the R1/R2 triggers and working your way gradually round the curved lower edge. You don’t need to stick anything too far into the case here.
Once you’ve unclipped the right hand side of the cover, gently pull the two halves of the device apart. The bottom and left clips should unclip themselves without too much hassle.
Now that you’re inside, carefully peel back the foil covering the hidden screw on the EMC shield. You’ll need to reuse this later.
Remove the three screws holding the EMC shield down, and lift it off taking care not to snag the fan cable. Again, keep track of the different screw lengths.
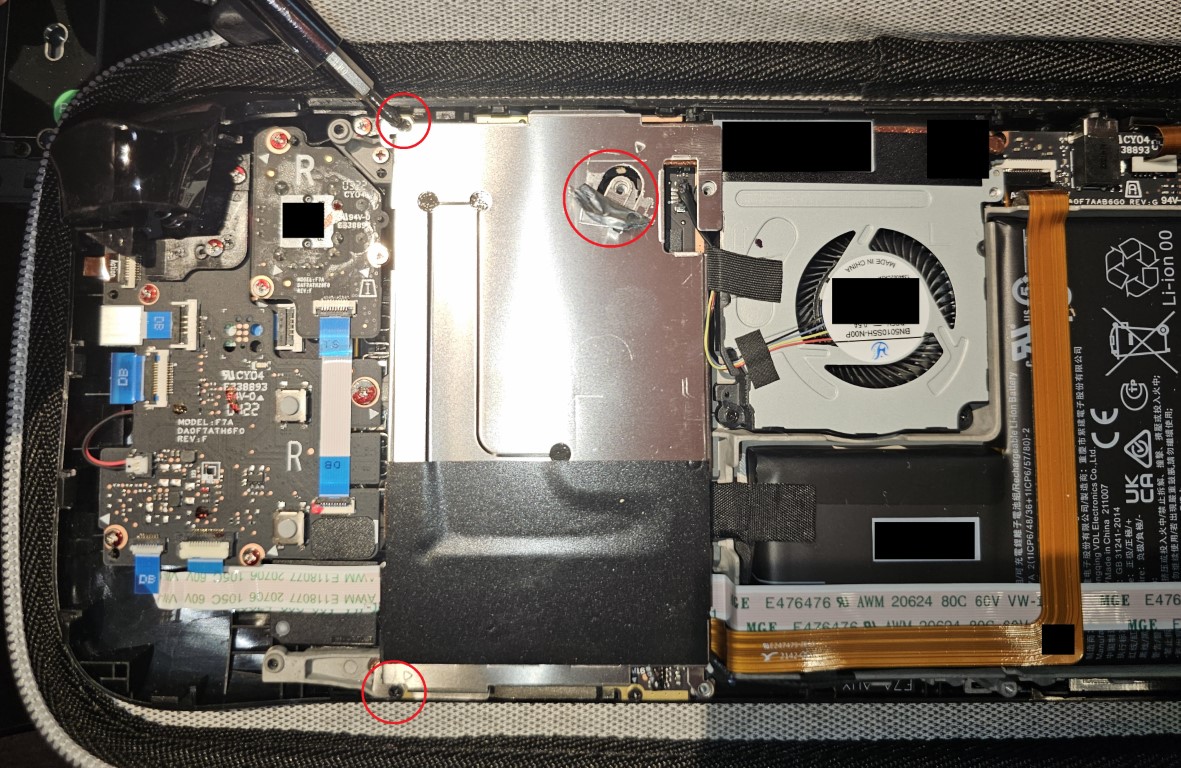
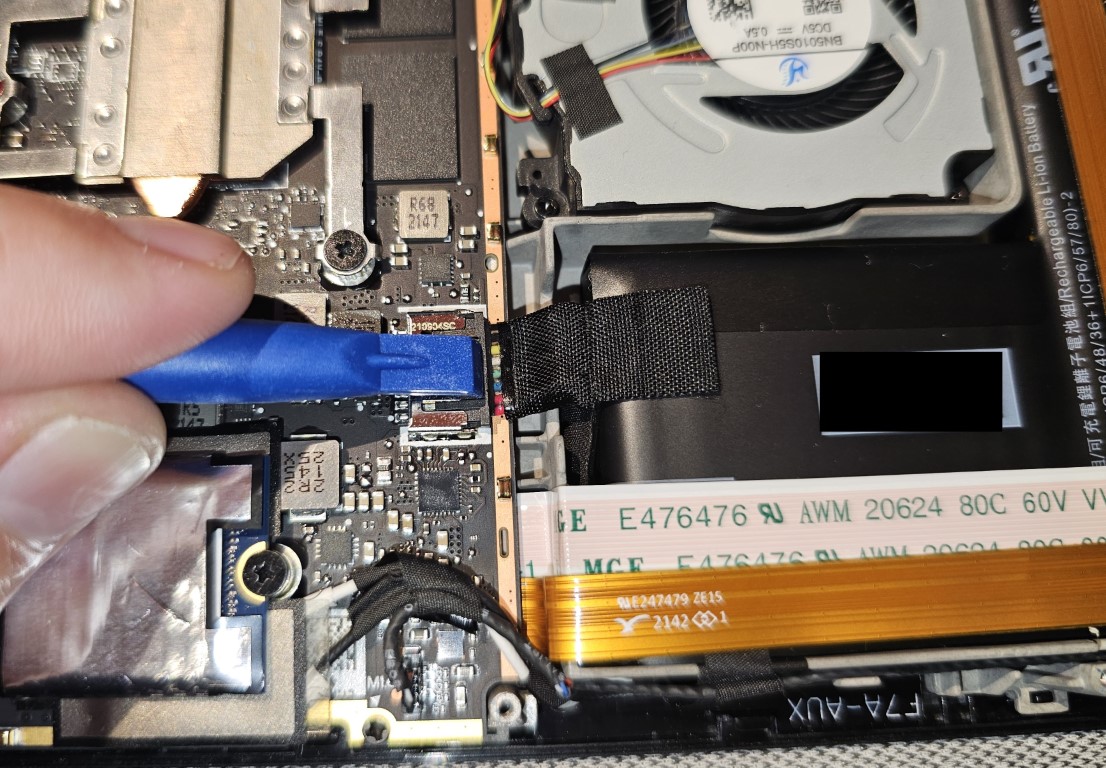
Disconnect the battery by pulling on the fabric tab. If necessary, you can help release the connector by gently pushing the connector away from the socket.
Unscrew the SSD and it will pop up at an angle, ready for removal.
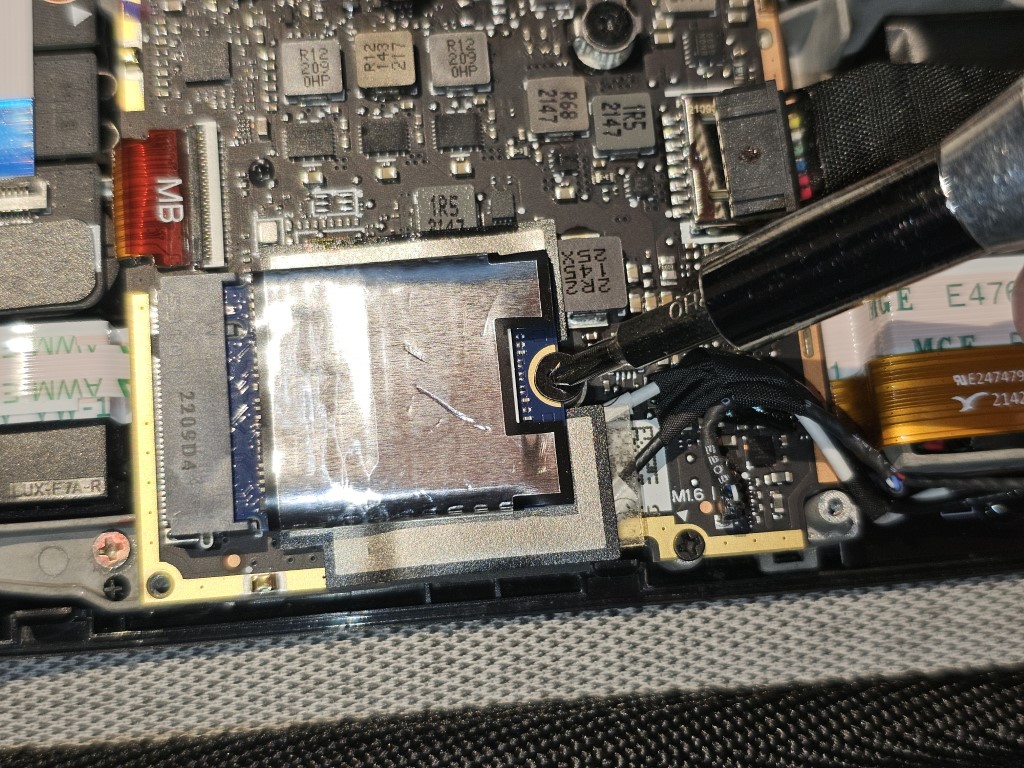
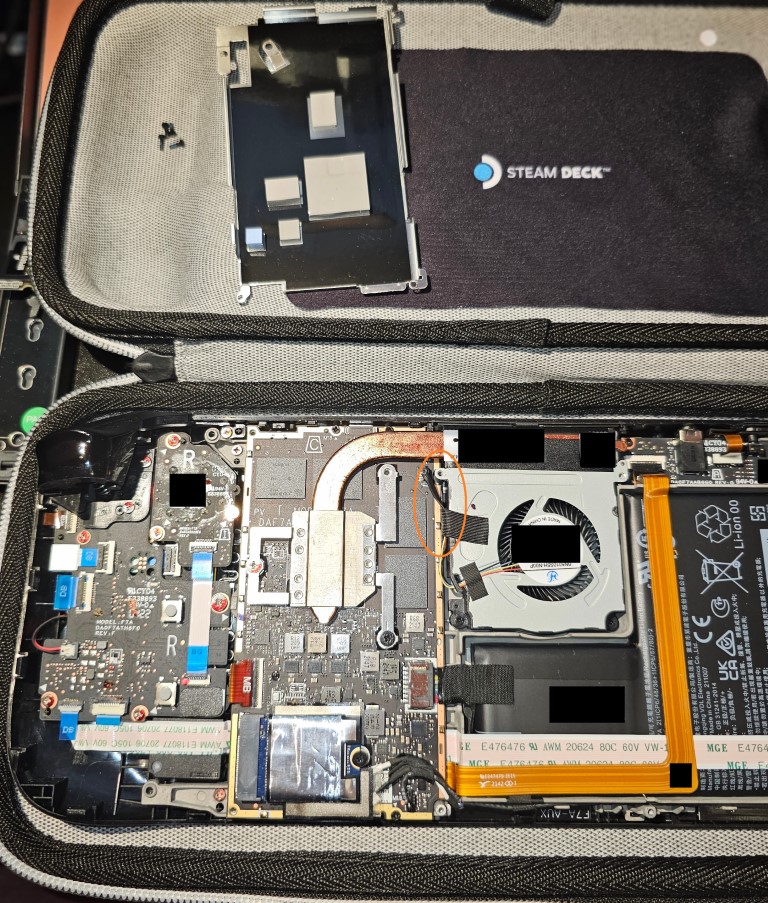
Slide the EMC shield foil off the old SSD - you might have to separate the adhesive seam.
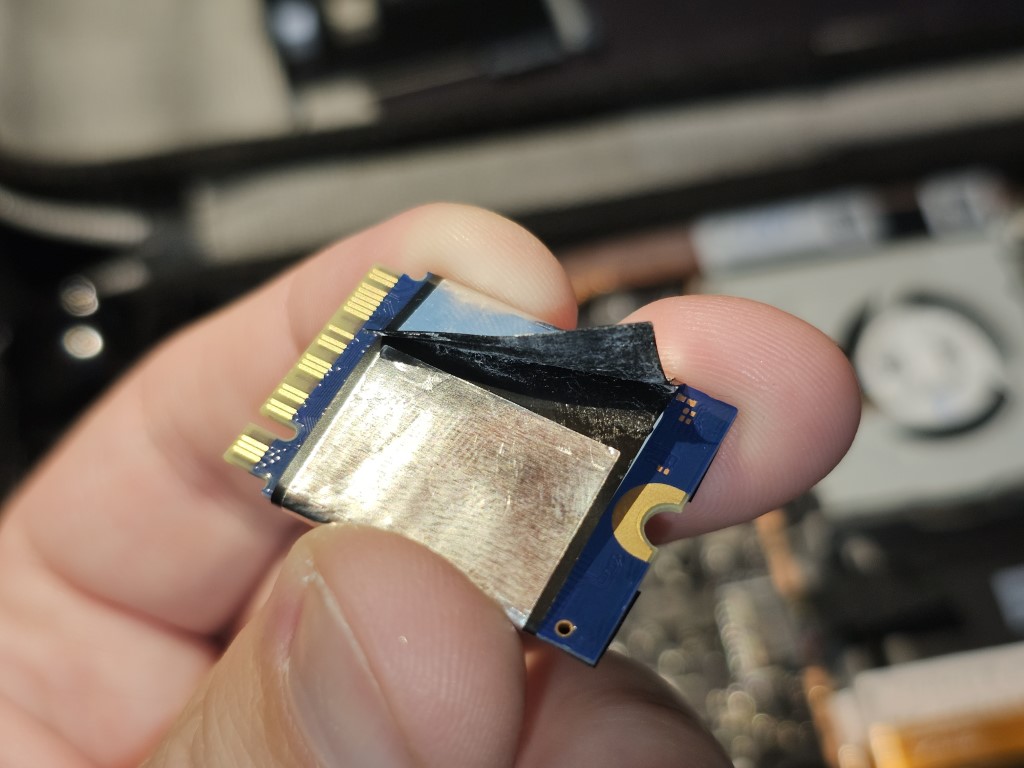
Transfer the EMC foil to your new SSD. Insert it in the slot at an angle - it will naturally remain sprung ‘up’ until you screw it down.
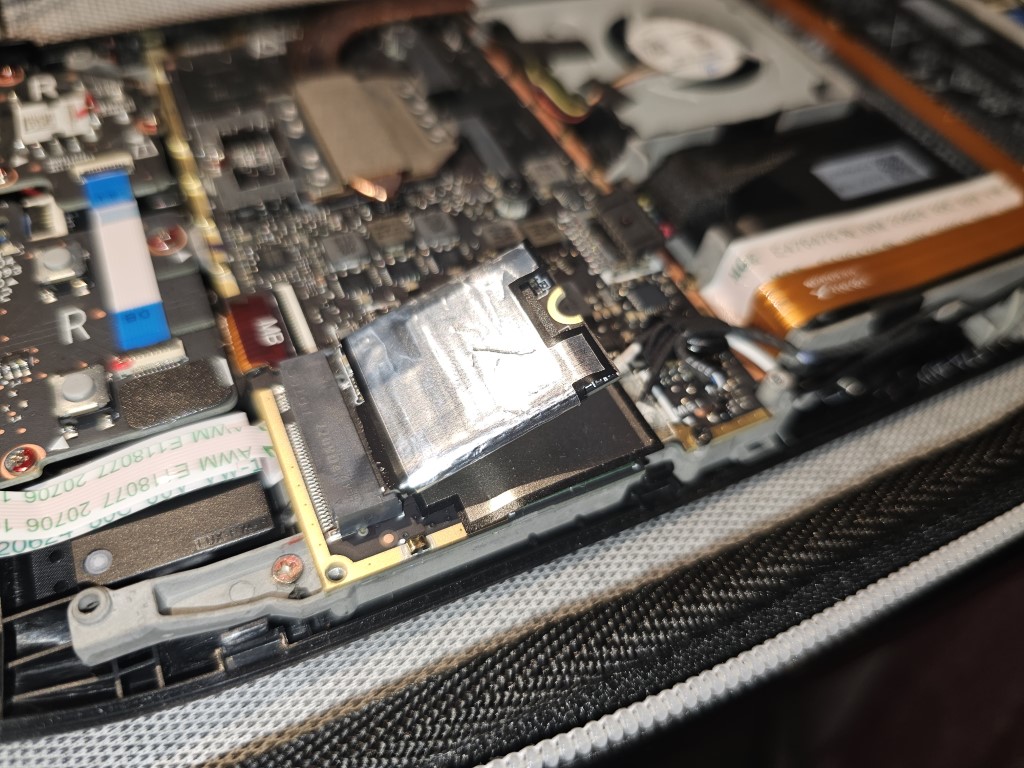
Screw down the new SSD, and reconnect the battery cable.
Reinstall the EMC shield, remembering to cover the foil back over the hidden screw.
Clip the back cover on simply by pressing the two halves of the console together. Reinstall the 8 rear cover screws, taking care to remember the long ones go in the outermost 4 screw-holes.
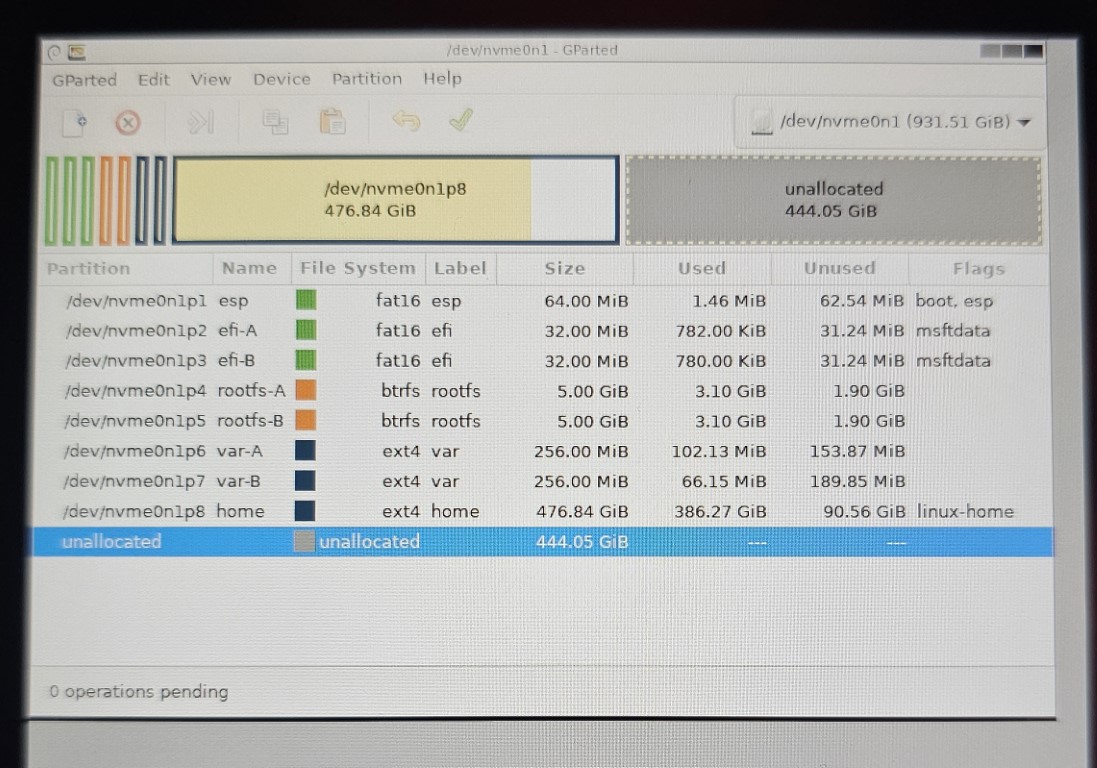
If you plan to use this storage in SteamOS, congratulations! Go ahead and turn on the Steam Deck.
In Storage settings, you should see your new space ready to use.
If you plan to install Windows, don’t power up your Steam Deck yet!
SteamOS will automatically expand to take up the new space, so if you do power on you’ll need to reboot into a bootable GParted Live USB stick to shrink the /home partition again. I found this out the hard way…
Installing Windows⌗
Boot from your choice of USB media (I just used the official Microsoft Windows Media Creation tool), and select the appropriate ‘unallocated space’ to install Windows into.
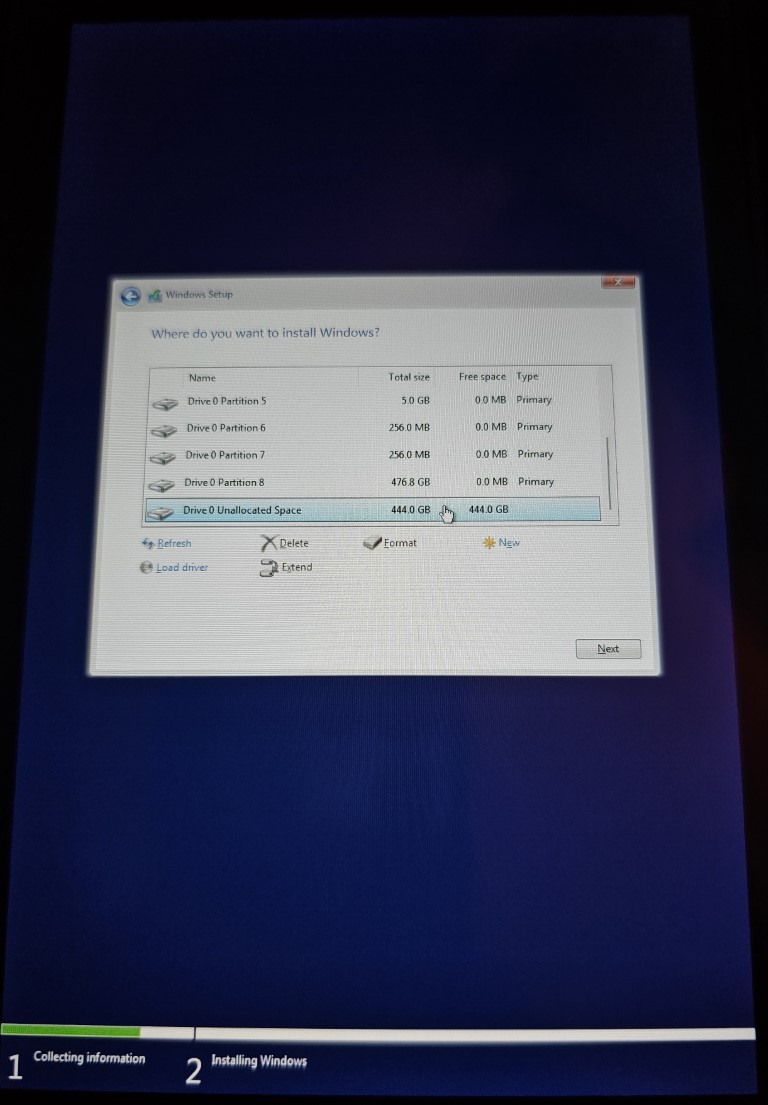
Follow the rest of the instructions just like installing Windows on any normal PC. Once booted, you can install the Valve Steam Deck Windows driver pack from here to enable audio, bluetooth and other features.
Using Game Pass⌗
With a keyboard and mouse attached you can simply run the Xbox application from the Microsoft Store and install any games you want. You can even install games from Steam, but they might not be as optimised as a Linux version, or even the Windows version running under Proton.
Of course, using a keyboard & mouse defeats the purpose of the Steam Deck entirely. This is where things get confusing. In short, the Steam Deck Controller doesn’t appear to Windows like a normal gamepad. When Steam is running, it can ‘see’ the controller and handle all the input events - but this only works for Steam games, which we had in SteamOS already!
The simplest solution for me is to install GloSSI - short for ‘Global System-wide Steam Input’. Basically, this puts a dummy ‘game’ in your Steam library that you can launch before any Windows Store games, which enables full controller support to be passed through. It works because Steam thinks you are running a game, and allows the controller to act as a virtual Xbox gamepad which can be seen by your games.
There are other options for doing the same thing, such as SWICD and Steam-Deck-Tools, I recommend you experiment with different tools and see what you prefer. I like the simplicity of GloSSI being able to add my non-Steam games as Steam shortcuts.
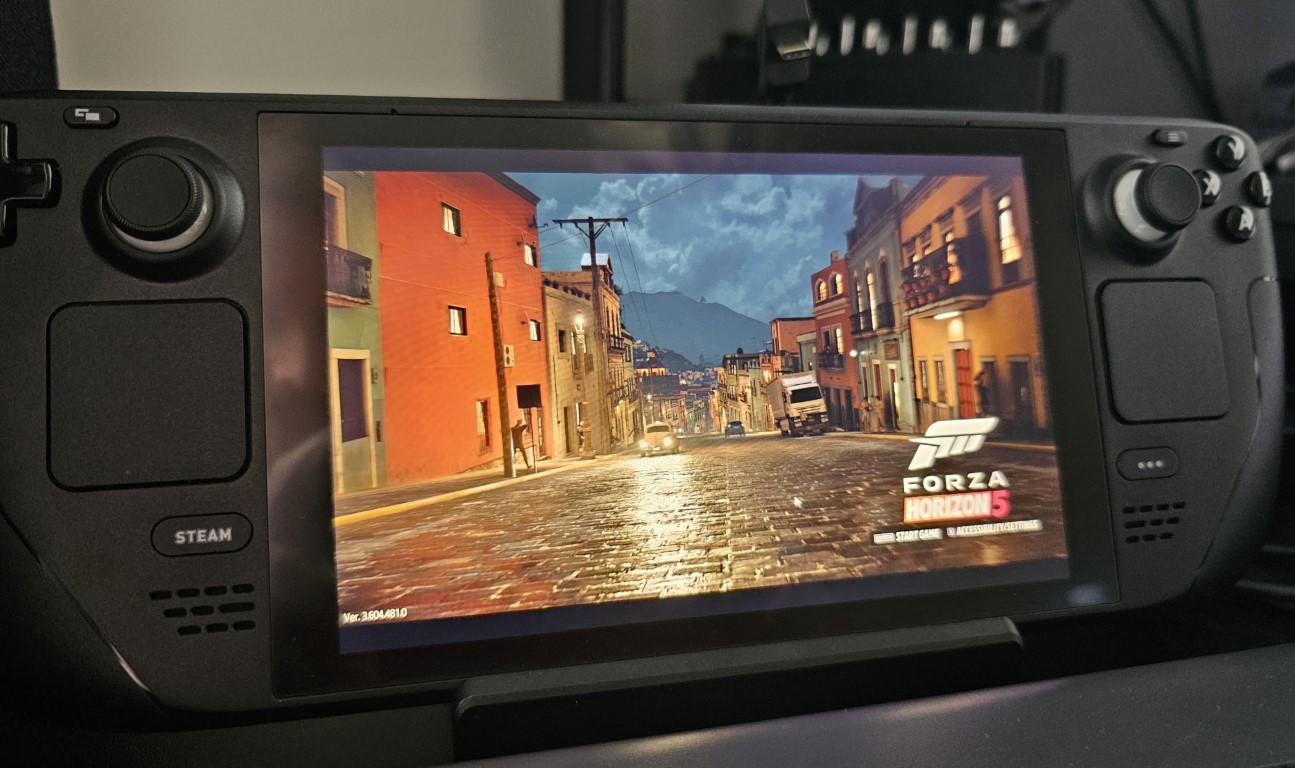
With a bit of luck, you’ll be able to play games like Forza Horizon 5 without much hassle at all.
Things to watch out for⌗
-
Your Steam Deck will always boot first into Windows now. The temporary workaround is to hold Volume Down + Power to start it up via the Boot Menu and select SteamOS. A more permanent fix is to install something like Clover Bootloader which takes care of managing boot options for you. I haven’t tried this yet.
-
Windows doesn’t have native support for managing the refresh rate or thermal profiles, so some games will have bad screen sync, generate lots of heat, or drain your battery quickly. This can’t really be helped for now.


